A collection of recipes and helpful hints from my home kitchen to yours!!
Sunday, November 11, 2012
Apple Crunch
The hubby recently went grocery shopping and brought back a five-pound bag of red delicious apples. I told him that was a lot and he said, "Dominic likes apples doesn't he?" We all like apples here and we could probably eventually eat that many, but lately I have been thinking about making an "apple betty." I started searching through my collection of cookbooks and found something in a cookbook published in 1938 by The Midland Flour Milling Company in Kansas City, Missouri, called an "apple crunch." I've heard of buckles, cobblers, and crisps, but never a "crunch." One of the products the company produced was/is Town Crier Flour. I did a little research and couldn't find very much information on the company and whether Town Crier Flour is still being manufactured. I'm not 100% sure where this cookbook came from. My grandmother was from Missouri and her dad was a baker, so it makes sense that it might have belonged to her. But, I did acquire some cookbooks that belonged to my mother-in-law and she did a fair amount of baking, so it might have been hers. In the ingredient list, it had nutmeg or cinnamon with no measurement listed. I guessed at how much to use and whether I should use cinnamon or nutmeg. Being a cinnamon gal, I picked that spice over nutmeg. I love this cookbook because it has 300 recipes all using the Town Crier Flour. I guess I have another 299 recipes to try!!!
Ingredients:
6 large apples, peeled and cored, sliced thin
1/2 cup white sugar
Topping:
1 cup white flour
1 cup light brown sugar
1/2 teaspoon cinnamon
1/2 cup unsalted butter, slightly softened
Preheat oven to 350 degrees. Spray the bottom of a 9 x 13 inch baking pan and set aside. In small bowl, mix the flour, brown sugar and cinnamon with large spoon until well blended. Using two knives "cut" in the butter until the mixture resembles small crumbs. Set aside. Peel, core and slice the apples and put in a single layer on the bottom of the baking pan. Sprinkle the white sugar on top of the apples. Cover evenly with the topping mixture. Bake for 30-35 minutes or until apples are soft and bubbly. The hubby and I had this after breakfast, but it would be superb warm with a small scoop of vanilla ice cream on top for an after dinner dessert :)
Sunday, November 4, 2012
Mexican Taco Dip
Now that we are into the month of November, it seems like suddenly we're into the holidays!! That means going to parties :) Instead of taking the usual chips and salsa to your next get together, try making this mexican taco dip. I whipped this up in less than ten minutes, so if you get invited last minute to a party, don't worry.
Ingredients:
16-ounce can refried beans
1/2 cup salsa
1 cup sour cream
Taco seasoning mix (1.25 ounce package)
1 cup shredded cheddar cheese
1 small tomato (seeds removed and diced)
Tortilla chips
In small bowl, mix refried beans and salsa together until creamy. Spread evenly on the bottom of 9-inch pie pan. In separate bowl, mix sour cream and 2 1/2 teaspoons taco seasoning mix. Save remaining taco seasoning mix for the next time you make tacos or this dip :) Spread sour cream mixture on top of beans and salsa. Sprinkle cheddar cheese evenly on top. Cover with plastic wrap and put in fridge until ready to eat. When ready to enjoy, toss diced tomatoes on top. Serve with tortilla chips.
Monday, October 29, 2012
Pumpkin and Oatmeal Scones
I love to make muffins, but sometimes I just feel like making scones. A scone is a fancy word for a "rich quick bread cut into a triangle shape" according to the Merriam Webster Dictionary. Pumpkin is so versatile and I have been testing it in different baked goods lately, like my pumpkin chocolate muffins a few posts ago. Lauren and I split one of the scones yesterday for a late afternoon "snack." Scones are yummy anytime of the day, not just for breakfast!
Ingredients:
2 cups white flour
1/3 cup light brown sugar
1/2 teaspoon ground cinnamon
1 teaspoon baking powder
1/4 teaspoon baking soda
1/4 teaspoon salt
1/2 cup unsalted butter, softened
1/4 cup milk
3/4 cup packed pumpkin
1/2 teaspoon vanilla extract
1/2 cup old fashioned oats
Preheat oven to 350 degrees. Blend flour, brown sugar, cinnamon, baking powder, baking soda and salt together in a large bowl with large spoon. Using two knives, "cut" butter in until it resembles large crumbs. Add remaining ingredients and mix well. On floured surface (I used about 2 teaspoons flour) take the mixture and knead about 15-20 times. Put flour on the palms of your hands, if necessary too - the mixture may be a little sticky! Press into a 9-inch circle to about 1/4 to 1/2 inch in thickness. Using a serrated knife, cut into eight equal sized triangles and place on cookie sheet lined with parchment paper. Bake about 20 minutes or until a toothpick inserted into the middle of the scones comes out clean. Remove from oven and immediately transfer to a wire rack to cool. Store covered at room temperature.
*These scones are fabulous on their own, but if you want to make a really EASY chocolate glaze, when the scones are completely cool, just melt one ounce of a "Baker's Semi-Sweet Chocolate Premium Baking Bar" in a small bowl in the microwave and drizzle with a spoon!
*Photo courtesy of: Mary Gajda- Capital Area Women's Lifestyle Magazine
2 cups white flour
1/3 cup light brown sugar
1/2 teaspoon ground cinnamon
1 teaspoon baking powder
1/4 teaspoon baking soda
1/4 teaspoon salt
1/2 cup unsalted butter, softened
1/4 cup milk
3/4 cup packed pumpkin
1/2 teaspoon vanilla extract
1/2 cup old fashioned oats
Preheat oven to 350 degrees. Blend flour, brown sugar, cinnamon, baking powder, baking soda and salt together in a large bowl with large spoon. Using two knives, "cut" butter in until it resembles large crumbs. Add remaining ingredients and mix well. On floured surface (I used about 2 teaspoons flour) take the mixture and knead about 15-20 times. Put flour on the palms of your hands, if necessary too - the mixture may be a little sticky! Press into a 9-inch circle to about 1/4 to 1/2 inch in thickness. Using a serrated knife, cut into eight equal sized triangles and place on cookie sheet lined with parchment paper. Bake about 20 minutes or until a toothpick inserted into the middle of the scones comes out clean. Remove from oven and immediately transfer to a wire rack to cool. Store covered at room temperature.
*These scones are fabulous on their own, but if you want to make a really EASY chocolate glaze, when the scones are completely cool, just melt one ounce of a "Baker's Semi-Sweet Chocolate Premium Baking Bar" in a small bowl in the microwave and drizzle with a spoon!
Monday, October 22, 2012
Halloween Graham Cracker Houses
I went to one of my favorite stores, World Market, about a week or so ago. They have over 250 locations across the United States. The store is incredible. They have foods, coffees, beverages and more from all over the world - I am definitely in my element in a store like that :) Anyways, I was in there picking up some coffee and looking for chocolate Advent calendars for the kids. For the past several years, I have been buying the Christmas gingerbread house kits from World Market. The kits were already out, but I decided to hold off for a while until a coupon comes along in the newspaper :) I don't know that I've ever seen a kit for making Halloween houses in the store, but a few of the Halloween books that I took out from the library showed some pretty cool Halloween houses. They were made out of graham crackers and store bought canned frosting. I was EXTREMELY skeptical that canned frosting would hold the house together. Much to my surprise it actually works!
I took a sandwich sized zipper lock bag, filled it with about two tablespoons of frosting, pushed it down towards one end of the bag and snipped a very small corner off. Instant decorator bag :) I found an old cookie sheet and covered it with foil to put the house on. I used four graham crackers for the base of the house putting the frosting on the edges. I then used another four crackers for the roof. Two went length wise and two went width wise. I would recommend letting it sit about 1-2 hours to dry, but if you're impatient like I was, you don't have to!
Dominic was my assistant for this experiment, he made most of the roof decorations. What I liked best about making it ourselves is how inexpensive it was. I used the Kroger brand graham crackers and frosting that was on sale :) The little pumpkins and candy corns came out of an "Autumn Mix" from Meijer. The semi-sweet chocolate morsels I already had in my pantry. The Smarties and M&M's were snitched out of our stockpile of candy that we're getting ready to hand out in a few weeks for Halloween. Let your imagination be your inspiration for how to decorate!!
I took a sandwich sized zipper lock bag, filled it with about two tablespoons of frosting, pushed it down towards one end of the bag and snipped a very small corner off. Instant decorator bag :) I found an old cookie sheet and covered it with foil to put the house on. I used four graham crackers for the base of the house putting the frosting on the edges. I then used another four crackers for the roof. Two went length wise and two went width wise. I would recommend letting it sit about 1-2 hours to dry, but if you're impatient like I was, you don't have to!
Dominic was my assistant for this experiment, he made most of the roof decorations. What I liked best about making it ourselves is how inexpensive it was. I used the Kroger brand graham crackers and frosting that was on sale :) The little pumpkins and candy corns came out of an "Autumn Mix" from Meijer. The semi-sweet chocolate morsels I already had in my pantry. The Smarties and M&M's were snitched out of our stockpile of candy that we're getting ready to hand out in a few weeks for Halloween. Let your imagination be your inspiration for how to decorate!!
Thursday, October 18, 2012
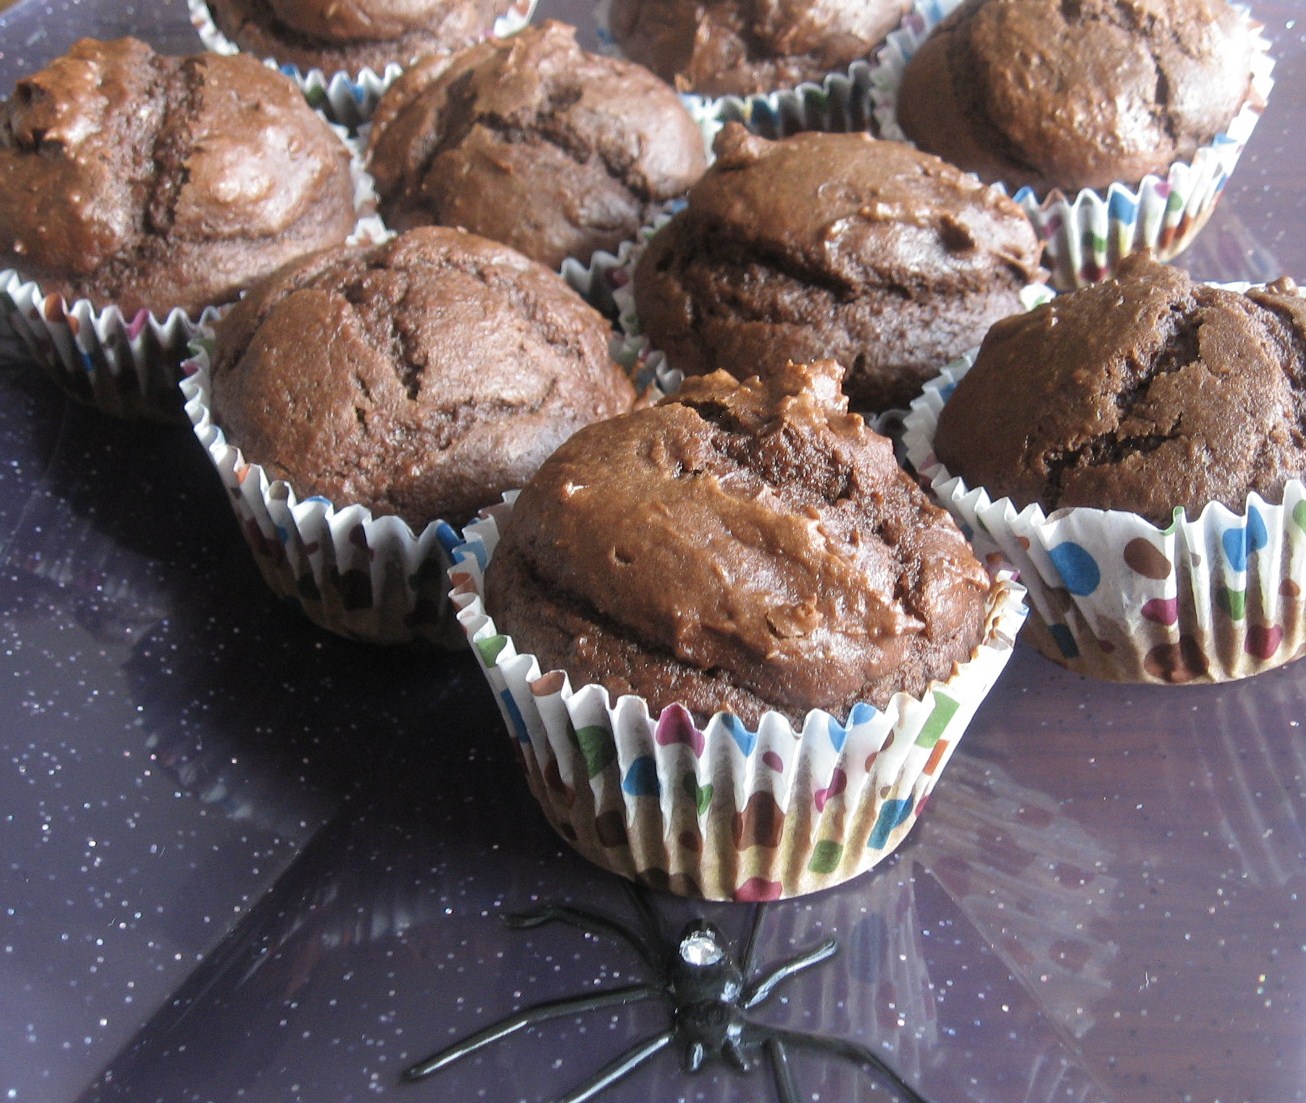
Pumpkin Chocolate Muffins
It's hard to believe, but the month of October is more than half over. I've been doing a lot of baking lately - I seem to do that more when the weather gets cooler (it warms up the kitchen and also makes it smell good)!! The muffin that seems to be the most popular on the breakfast menu this month are my pumpkin muffins. All members of our family also like chocolate. I was thinking this week, why not combine the two?? The muffins below look like they have no pumpkin at all in them. Trust me, when you bite into one of these, you can detect just a hint of pumpkin, but it's not overpowering.
Ingredients:
1 1/2 cups white flour
1/2 cup unsweetened cocoa
1/2 teaspoon salt
2 teaspoons baking powder
1 teaspoon vanilla extract
1/4 cup margarine, melted
1/2 cup brown sugar
1/2 cup white sugar
2 large eggs
2 tablespoons milk
1 cup packed pumpkin
Preheat oven to 375 degrees. Put paper liners in a 12-cup muffin tin and set aside. In large bowl, put all ingredients above in the order given. Stir with large spoon until well combined. Distribute batter evenly into the muffin tins and bake for 15-18 minutes or until a toothpick inserted in the middle of the muffin comes out clean. Remove to wire rack to cool.
Tuesday, October 9, 2012
Traditional S'mores Pie
Summer may be over, but a summertime camping favorite doesn't
need to be put away until next year!! I had a request several months
ago from a dear friend of mine to make a dessert featuring s'mores. I'm always up for a challenge when it comes to baking. This pie features a graham cracker crust, chocolate and marshmallow creme. It truly tastes like the traditional s'mores you would make around the campfire. The
closest I ever came to true camping in the wilderness was when I was little and slept in a
pup tent in my backyard :) The hubby was working from home today and I
gave him a piece of this pie. He told me he had never heard of s'mores before, much less ever eaten one. Guess he was never a Boy Scout!!! This pie is super rich, but it's not like you eat s'mores everyday, is it?? To make it even more decadent, I drizzled some chocolate syrup on top!
Ingredients:
1/2 cup margarine, softened
1 cup white sugar
1 cup white flour
2 large eggs, beaten
1/2 cup unsweetened powdered cocoa
1/4 teaspoon salt
1/2 teaspoon baking powder
1 teaspoon vanilla
3 tablespoons milk
1 ready-to-eat graham cracker pie crust
7-ounce container marshmallow creme
Preheat oven to 350 degrees. In large bowl, put margarine, sugar, flour, eggs, cocoa, salt, baking powder, vanilla and milk. Mix by hand with spoon until well combined. Pour mixture into graham cracker crust and bake 40-45 minutes or until a toothpick inserted in the middle comes out clean. Cool completely on wire rack. Stir marshmallow creme until it becomes smooth and creamy and spread on top of pie. Just a heads up - having never worked with marshmallow creme before, I discovered it's pretty sticky! Put pie in fridge at least one hour. Remove pie from fridge when ready to eat and enjoy!! If so desired, feel free to drizzle a little chocolate syrup on top. This pie must be stored in the refrigerator - not at room temperature :)
Ingredients:
1/2 cup margarine, softened
1 cup white sugar
1 cup white flour
2 large eggs, beaten
1/2 cup unsweetened powdered cocoa
1/4 teaspoon salt
1/2 teaspoon baking powder
1 teaspoon vanilla
3 tablespoons milk
1 ready-to-eat graham cracker pie crust
7-ounce container marshmallow creme
Preheat oven to 350 degrees. In large bowl, put margarine, sugar, flour, eggs, cocoa, salt, baking powder, vanilla and milk. Mix by hand with spoon until well combined. Pour mixture into graham cracker crust and bake 40-45 minutes or until a toothpick inserted in the middle comes out clean. Cool completely on wire rack. Stir marshmallow creme until it becomes smooth and creamy and spread on top of pie. Just a heads up - having never worked with marshmallow creme before, I discovered it's pretty sticky! Put pie in fridge at least one hour. Remove pie from fridge when ready to eat and enjoy!! If so desired, feel free to drizzle a little chocolate syrup on top. This pie must be stored in the refrigerator - not at room temperature :)
Wednesday, October 3, 2012
Apple Crumb Muffins
Fall officially arrived a little less than two weeks ago. Some of the trees where we live are starting to lose their leaves. The nights are getting cooler and we might have to put on the heat soon!!
When the air starts getting that chill, it makes me think of apples and cinnamon - a perfect combination. Being that October is National Apple Month, I guess that's why I had a taste for apple crumb pie. But, as much as I love to bake, pies are one dessert I still need to master. I can probably count on one hand how many fruit pies I have made in my life. That being said, I decided instead to try and replicate the flavors and make an apple crumb muffin. There is cinnamon in both the batter and the topping of these muffins. When these were baking, they smelled super yummy. I could barely wait for them to come out of the oven before I "sampled" one!!
Ingredients for batter:
2 1/2 cups white flour
1/2 cup white sugar
2 large eggs
1/2 cup canola oil
1 teaspoon baking soda
1/2 teaspoon salt
1/2 teaspoon baking powder
1 teaspoon cinnamon
2 cups peeled and shredded apple (about 4 medium)
Topping:
1/4 cup light brown sugar
1/2 tablespoon white flour
1/2 teaspoon cinnamon
1 tablespoon margarine
Directions:
Preheat oven to 350 degrees. Place paper liners in a 12-muffin tin pan and set aside. In large bowl, place all ingredients for the batter in the order given and mix with large spoon until well combined. Distribute batter evenly into muffin tin. In small bowl, mix the topping ingredients together until it resembles small crumbs. Sprinkle the topping evenly between the muffins. Bake for about 20 minutes or until a toothpick inserted in the middle of the muffins comes out clean. Let cool 10 minutes and remove to wire rack.
When the air starts getting that chill, it makes me think of apples and cinnamon - a perfect combination. Being that October is National Apple Month, I guess that's why I had a taste for apple crumb pie. But, as much as I love to bake, pies are one dessert I still need to master. I can probably count on one hand how many fruit pies I have made in my life. That being said, I decided instead to try and replicate the flavors and make an apple crumb muffin. There is cinnamon in both the batter and the topping of these muffins. When these were baking, they smelled super yummy. I could barely wait for them to come out of the oven before I "sampled" one!!
Ingredients for batter:
2 1/2 cups white flour
1/2 cup white sugar
2 large eggs
1/2 cup canola oil
1 teaspoon baking soda
1/2 teaspoon salt
1/2 teaspoon baking powder
1 teaspoon cinnamon
2 cups peeled and shredded apple (about 4 medium)
Topping:
1/4 cup light brown sugar
1/2 tablespoon white flour
1/2 teaspoon cinnamon
1 tablespoon margarine
Directions:
Preheat oven to 350 degrees. Place paper liners in a 12-muffin tin pan and set aside. In large bowl, place all ingredients for the batter in the order given and mix with large spoon until well combined. Distribute batter evenly into muffin tin. In small bowl, mix the topping ingredients together until it resembles small crumbs. Sprinkle the topping evenly between the muffins. Bake for about 20 minutes or until a toothpick inserted in the middle of the muffins comes out clean. Let cool 10 minutes and remove to wire rack.
Subscribe to:
Posts (Atom)
Club Cracker Toffee
You know when you have a "taste" for something and until you eat it, you won't be satisfied? Late yesterday afternoon, I want...
-
I found this coffee cake recipe in an American-Slovene Club cookbook from 1951 that was published in Cleveland. After TONS of researc...
-
I love being a volunteer "Field Editor" for Taste of Home magazine! We talk about food ALL the time, plus as an added bon...
-
In honor of January being National Soup Month I created this new recipe. My oven was out of commission for almost two weeks and since I do ...